tools + equipment

Friends have asked me about my set up and which tools I use to get my tall cakes. If you want to see a quick list, here is my amazon storefront hhttps://www.amazon.com/shop/influencer-35fa14f2! Here I explain the baking tool basics (things I wish I had right away when I started), baking tools wants but not needs, and things that are just super nice to haves. ALSO, you’ll find that I share my photography and videography equipment and tools.
Basic baking tools
-
-
If you’re only going to get one size piping bag, I would recommend this size. These are great for piping batter, chocolate, candy melts, royal icing, and of course – frosting! They’re easy to tie up and they’re durable too.
-
-
Piping tips: link here
-
I recommend trying out a few piping tips when you’re first starting out to get a feel for what you like. A basic set like this is nice because you’ll likely use these the most often. You’ll find you have favorite tips over time! Mind is a 32 tip.
-
-
Cake scraper (basic and stripe): link here
-
SOME might debate and tell me that a stripped cake scraper isn’t really basic but if you knew how easy it was to use – you would! It’s a really easy way to make a simple cake “fancy”. Even a store bought cake believe it or not! Anyways, here is a picture from a Hello Kitty live takeover that I did where I was in the process of making a striped cake.
-
-
-
Start with the least expensive cake boards before getting into the fancy ones IMO. There is a lot of trial and error that happens in the beginning – that’s normal! It feels like there are a lot of #fails but this is part of the journey of learning.
-
-
When I started baking, I was recommended so many sized spatulas and in the end, I only really ever use my trusty 9” angled spatula (I wish I had saved my money!). I prefer one with a plastic handle so I can toss it in a dishwasher (wooden utensils should always be washed by hand).: link here
-
Cake pan: link here
-
The most standard sized cake pans are an 8” and 9” pan – cakes at this size often seemed 2 layered. I prefer a smaller size! A 6” pan was one of my first investments as a baker and since then my go to has gotten smaller.
-
-
Parchment papers: link here
-
I use to bake with silicon mattes but sometimes they ruin food or give off a weird smell when baked. I love the classic parchment paper.
-
-
Baking sheet: link here
-
I bake all of my cake, cake pans on top of a baking sheet now. I feel it gives me the best heat distribution and therefore the tastiest cake. Believe it or not, a shiny versus dark matted baking sheet pan give off a different amount of heat.
-
-
This food coloring set: link here
-
I love a food coloring in a squeeze bottle versus a twist top. They don’t dry out. I wish I had known this as soon as I started baking. Also, a gel food paste is more concentrated giving, a lot of the times, the most true colors without adding too much moisture back into what you’re making.
-
-
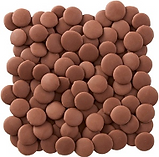
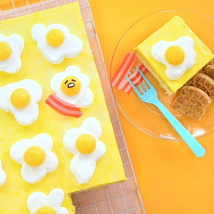
Candy melts: link here
-
I use these all the time for decorating
-
-
Vanilla extract: link here
-
Vanilla extract quality matters a whole lot when baking. This is an area where I recommend investing in quality over quantity.
-
-
Metal bowls: link here
-
Go for basic metal bowls! I know it’s tempting to get rubber bottom bowls (so fancy) but if you’re going to make swiss meringue buttercream or melt chocolate, the rubber won’t cut it lololol. Also, having stacked metal bowls helps me organize my space a little better if your place isn’t huge (which mine isn’t).
-
Want but not needs
-
Parchment rounds/ liners: link here
-
So technically if you have parchment paper you can make parchment rounds so these are a luxury! I bake SO often that I feel this is a necessity but if you’re baking for special occasions, just stick with the parchment you have.
-
-
Square cake pans: link here
-
You know, for when you’re feeling fancy.
-
-
Square cake boards: link here
-
For when you’re feeling fancy but want to bring that fanciness somewhere.
-
-
Acrylic disk: link here
-
I love these for getting sharp edges on a cake but they’re not necessary at all. You could use a cake board to do exactly the same thing but I like the idea that this is re-usable.
-
-
Cake turntable: link here
-
I get a lot of asks about where I get mine from so here it is!
-
-
This food coloring set: link here
-
You don’t NEED a huge set of colors but if you’re going to decorate more often as a hobby – I recommend this. Here’s what I’ve found... yes you can mix your own colors BUT when you run out of buttercream mid process.. and try to mix it again… it’s not always a perfect match! This happened to a mummy cake a made a while back.
-
-
Hand mixer: link here
-
Fun fact! I owned a stand mixer before I owned a hand mixer.
-
A hand mixer is a great option if you don’t have much counter space.
-
I went over to my friend Kate’s place to make dairy free pumpkin chocolate chip cookies for a bake sale (they were most excellent!). “Kate where is the mixer?”. She grabbed a spoon. I wish she had at least this even though the experience was really fun. No joke – when she gets married I’m getting her a mixer!
-
-
Spray bottles link here
-
I keep alcohol in these and use them to degrease anything that meringue will go into.
-
-
Sprinkles
-
This is a long conversation for another time.
-
It’s always great to have confetti and basic sprinkles around for decorating and baking.
-
Super nice
-
Ice cream scooper: link here
-
Great for cookies, icing and frosting distribution!
-
-
Fondant tool kit: link here
-
I JUST bought these and can’t wait to use them. I don’t do much fondant work but I’ll use these a lot with cookies.
-
-
Kitchen Aid Stand Mixer: link here
-
My mom was so kind to buy me this stand mixer. Every time I use it, I think of her! I have a 7 quart mixer and will probably upgrade to a commercial version someday for bulk bakes but this is my favorite and is the perfect size for demonstrations (the size I recommend friends and family make at home).
-
-
Sheet cake pan: link here
-
Great for sheet cake and brownies! What’s important about this is that it has sharp corners if you want that super sharp corner look.
-
-
Cake stand: link here
-
This is for presentation purposes. I don’t know that it’s necessary – I don’t think I started using one until year three of baking. I tried really hard to figure out occasions to use them too lol. I use them for photos these days.
-
-
Cake pop maker: link here
-
I like this! I use it for my surprise inside cake; here’s the video https://youtu.be/KFtm9Srn3YA
-
-
Candy melter: link here
-
You can melt candy melts in the microwave in 30 second increments but I’m a slow piper so this is nice!
-
-
Level: link here
-
I have a little OCD and love to have a perfectly even cake.
-
-
Piping bags in multiple sizes: link here
Video equipment
-
Camera: link here
-
Tripod: link here
-
Light: link here
-
Microphone lavalier: link here
-
Backdrop paper: link here
Photography equipment
-
Camera: link here
-
Tripod: link here
-
Memory card: link here
-
Light: link here
-
Marble: link here
-
Diffusor: link here
-
Color balance card: link here
*DISCLOSURE: As an Amazon Associate, I earn money from qualifying purchases.