tutorial: galaxy + baby yoda hot cocoa bombs
- roxstarbakes
- Feb 11, 2022
- 3 min read
Updated: Feb 12, 2022
Post: February 11, 2022
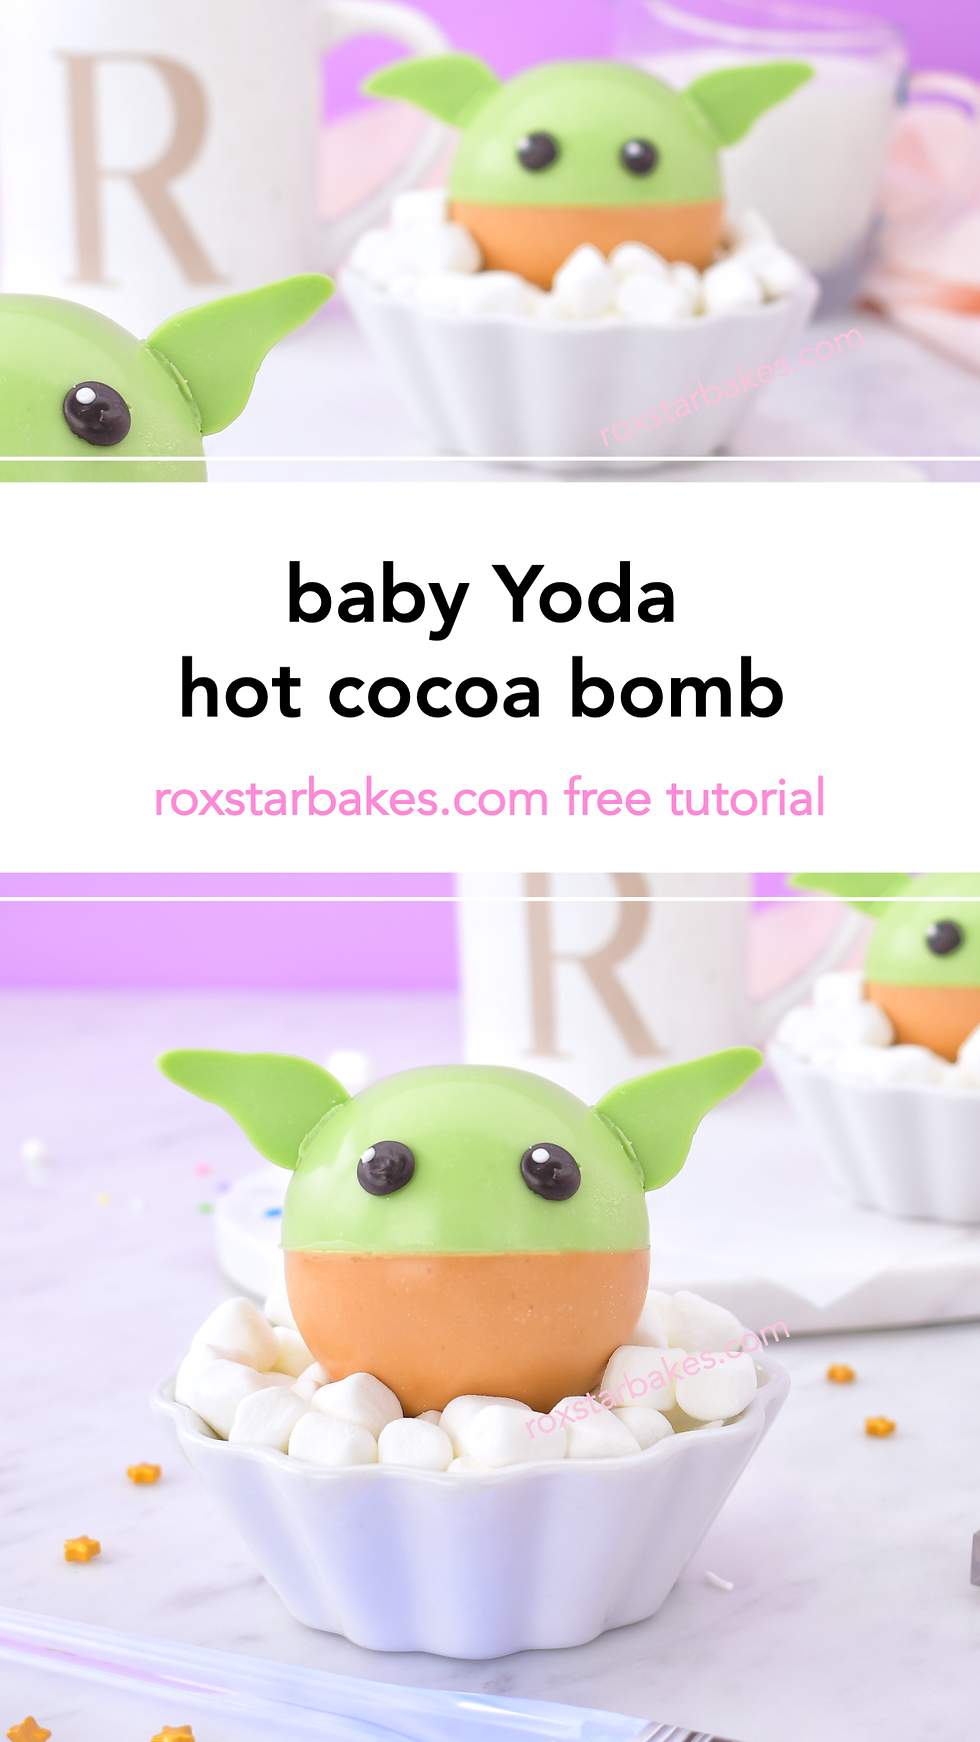
This week I'm sharing a Star Wars baby Yoda and galaxy hot cocoa bomb tutorial on YouTube! Here is the accompanying step by step. This project felt simpler than the Winnie the Pooh I just shared - I think it's because the face details aren't as small 😊.
I've mentioned this before, hot chocolate bombs are chocolate spheres that can come in different flavors and is filled with cocoa mix, marshmallows, candy, sugar cookie, glitter, and/or sprinkles. They open when introduced to milk offering a delightful surprise for whoever enjoys it. I wanted to share these before May the 4th Be With You - not sure how official the holiday is but it's so cute. #yoda #cocoabombs #disney #starwars
BTW, I was recently featured in the Seattle Times recently! If you'd like to learn more about me - here it is https://www.seattletimes.com/life/food-drink/this-self-taught-baker-creates-cute-treats-you-can-eat-make-your-own-with-this-hot-cocoa-bomb-recipe/

Tools:
· Plastic spoon or pastry brush
· Piping bag (optional) or ziploc bags
Ingredients:
Yoda
· 6-12 ounces green candy melts or white chocolate chips
· 6-12 ounces tan candy melts or white chocolate chips
· 3 ounces black candy melts or chocolate chips
· 3 ounces white candy melts or chocolate chips (optional)
· 1-2 tablespoons of cocoa mix per cocoa bomb
Galaxy
· 3 ounces blue candy melts or white chocolate chips
· 3 ounces pink candy melts or white chocolate chips
· 3 ounces purple candy melts or white chocolate chips
· 6-12 ounces black candy melts or white chocolate chips
· 1-2 tablespoons of cocoa mix per cocoa bomb
Optional
· Edible glitter (optional)
· Sprinkles (optional)
Instructions:
Step 1 – Place chocolate in a heat proof, microwave safe bowl. Microwave at 50% power in 30 second intervals stirring in between each interval. This takes about 1.5 to 2 minutes depending on your microwave.
o Alternative option is too use a chocolate melter/heater. Add candy coating/candy melt or chocolate. Just stir occasionally until smooth.
Step 2 (Yoda) – Fill 3 silicone half sphere molds with about 1 tablespoon of tan melt. Fill the other three with green for Yoda’s face. Use the back of a plastic spoon to spread around the chocolate or melt until it’s completely coated. Refrigerate 10-15 minutes or until it’s firm to the touch. With the left-over green melts, pipe small circles on a piece of parchment for the ears and set aside. Spread a second coat of matching colored chocolate or candy melt between all of the wells. It’s best to make the rims thicker. Refrigerate 10-30 minutes or until it’s firm to the touch.
Step 2 (Galaxy) – Fill 3 silicone half sphere molds with small brush stroke style streaks in blue, purple, and pink with the back of a spoon. Around the edges and in any holes, add some black melt. Refrigerate 10-15 minutes or until it’s firm to the touch. Spread a second coat of just black colored chocolate or candy melt between all of the wells. It’s best to make the rims thicker. Refrigerate 10-30 minutes or until it’s firm to the touch.
Step 3 – Release the half spheres by pulling around the mold edges to help release the chocolate. Then press your finger in the center of the half sphere and carefully push out.
Step 4 – Clean up the bottom cocoa bomb half by microwaving a plate for two to four minutes and then gently melting.
o Alternative method. Heat a baking sheet in the oven.
Step 5 – Melt chocolate or black candy melts and place in piping bag. Then pipe face on yellow half sphere cocoa bombs. Now gently melt that yellow half sphere, that has a face, and add it to the filled cocoa bomb half to close. Now melt the ears and attach. Allow everything to set.
o Tip: Work quickly so there aren’t fingerprints left.
Hot chocolate bomb success!!
Roxie
Save to Pinterest


Comments